
Purpose of the Sample:
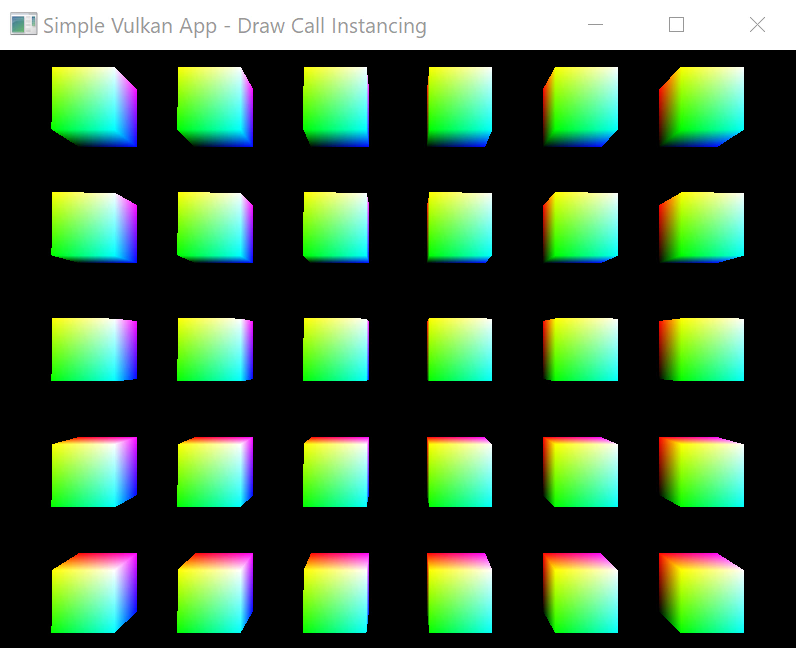
This sample demonstrates how to do several important things using the Vulkan rendering API. The sample shows how to create a logical device based on a physical device (IE. GPU) that supports certain features. You will also see how to create a vertex buffer, bind SPIR-V shaders, and of course, make instanced draw calls. By the way, instancing is a first class citizen in Vulkan! Please note, I derived this sample based on my learnings from the vulkan-tutorial.com online guide. Below is the end result.
The Vulkan Declaration of Independence:
Many folks have heard of the following famous line in the US declaration of independence.
We hold these truths to be self-evident, that all men are created equal, that they are endowed by their Creator with certain unalienable Rights, that among these are Life, Liberty and the pursuit of Happiness.
Folks generally make the mistake of assuming that writing a game using the Vulkan rendering API will make your game more performant. However, this is not the promise of modern rendering APIs like Vulkan and DirectX 12. Using a modern rendering API only offers you the pursuit of performance happiness. For many years, game developers, have complained that rendering APIs like OpenGL are not performant enough. Game Developers thought they could do a better job. Therefore GPU driver developers decided to troll game developers by forcing them to become GPU driver developers. You do have a lot more control and insight into the interaction between the CPU and GPU. However, that comes at a giant cost of complexity. When you decide to engage a modern rendering API like Vulkan or DirectX 12, you are no longer just writing rendering code. You are writing graphics drivers. You must explicitly manage synchronization between the CPU and GPU. You must explicitly setup most of the rendering states. You will need to enable validation layers if you want Vulkan to tell you about rendering issues. You will need to understand the details of and manage how data is uploaded from the CPU to the GPU. In summary, you will need to understand, in more detail, how a GPU works. Also, keep in mind that the GPU driver developers have had over 20 years to come up with slick optimization strategies for OpenGL and DirectX whereas game developers are now reinventing the wheel. Therefore your mileage may vary when it comes to comparing the performance difference between OpenGL and Vulkan.
Vulkan Keywords:
There are a few keywords you need to be familiar with before diving head first into Vulkan. I will list them below.
- Physical Device – This is the physical integrated (built into the main processor) or discrete (dedicated) GPU you will use.
- Logical Device – Most of your interaction with the Vulkan API will happen using a logical device. A Logical device represents a physical device with an explicit set of enabled features and extensions. OpenGL would automatically/implicitly enable extensions whereas Vulkan requires that we explicitly enable them via the logical device. The logical device allows us to do typical rendering tasks like creating vertex buffers, upload image data, record commands like draw calls or dispatch compute jobs.
- Queue Family – You must submit work to queues in order to perform operations on the GPU hardware. The operations in a single queue are processed in the order they were submitted. However, you can have multiple queues; each with its own set of operations. Each queue is processed independently. If needed, the queues can be synchronized with each other. There are several different kinds of queues. Each type of queue can represent a different part of the GPU hardware and support different kinds of work. Queues with the same capabilities are grouped into families. For example, you could have a GPU that has two graphics queues and one compute queue. This would be that you could divide your rasterization work into two independent queues and batch all your compute work together and execute all the work in parallel.
- Physical Device Properties – Contains general information about the GPU like its name, version of the driver, supported version of the Vulkan API. We can also use properties to determine if the GPU is integrated or discrete or even a CPU itself. You can use properties to also learn about specific limitations of the hardware like the max size of textures that can be created on it or how many buffers can be used in shaders.
- Physical Device Features – Additional Features that may be supported by the given hardware, but not required by the core Vulkan specification. Features include items such as geometry and tesselation shaders, depth clamp, and bias, multiple viewports, or wide lines.
- Descriptor – A resource uploaded from the CPU to the GPU. These could be things like vertex buffers.
- Descriptor Set – These are bound to a pipeline to specify an interface between the application and the shaders. A descriptor set allows resources to be grouped together into a set hence the name. This is similar to the idea of an OpenGL uniform buffer where you could store your model, view, projection matrix for use with a shader. You fill out all the data on the CPU and upload it to the GPU in a single batch.
- Descriptor Set Layout – These are used to inform the hardware as to what resources are grouped in a set, how many resources of each type there are, what their order is, etc.
- Render Pass – A render pass is an explicit core part of the Vulkan API. A render pass owns one or more “sub-passes”. The sub passes own a framebuffer with can have multiple attachments like a color buffer and a depth buffer. The sub passes can then reference the output of a prior sub pass’s framebuffer. For example, you can have two sub-passes where the first renders the scene into a frame buffer with a color and depth attachment. The second sub pass can then reference the color attachment in the first pass to render into only the color buffer into the swap chain.
- Graphics Pipeline State – This is a data structure that will make you question if you are a graphics programmer or an accountant filing taxes. It is a huge data structure that needs to be explicitly filled out. The GPU will use this to determine every last detail regarding how to render the frame. In OpenGL land, most of the render state is filled in with default values. You just explicitly change the states of things you are interested in. With Vulkan, you need to fill all of it out by hand. This includes things like the various shader stages you want to use (Vertex, Geometry, Fragment, etc), render passes you want to use, line widths, viewports sizes, blending, etc.
- Command Buffers – OpenGL and DirectX 11 both use a graphics context to allow you to issue commands to the GPU. Vulkan does not offer you a context. Instead, you use to fill a command buffer with commands and flush the commands into a queue which are then executed on the GPU.
- Validation Layers – The OpenGL driver implementation will normally validate any API calls you make to ensure they are reasonable and prevent crashing your system. However, validation takes time which costs performance. Therefore Vulkan doesn’t do any validation for you unless to explicitly enable validation checks. Furthermore, you can tell Vulkan what kinds of validations you want it to do to minimize the performance impact. This is done by explicitly enabling what are called “validation layers”.
GPU Memory Concepts
Contrary to OpenGL and DirectX 11, there is a little more work you need to do to upload data from the CPU to the GPU when using Vulkan. GPU memory is partitioned into two types of memory, Host Visible and Device Local GPU memory. Host visible memory is memory that exists on the GPU which is visible to the CPU. Therefore the CPU can copy system memory into this GPU host visible memory. For example, you will need to upload a vertex buffer from the CPU’s main memory into the GPU’s host visible memory. GPU host visible memory is slower to use than the device local memory but it allows you to map memory from the CPU to the GPU. Device local memory is intended to be memory that is fast to access for memory operations that need to be fast like texture sampling. Device local memory is not touchable by the CPU. Therefore to upload texture data to device local memory, you must first upload the data from the CPU to the GPU’s host visible memory. From there, you must upload the data in the host GPU’s host visible memory into the GPU’s local device memory. Graphics engineers normally call the upload from CPU memory to the GPU’s host visible memory the “staging buffer”.
How Do You Draw Many Cubes With a Single Draw Call?
Via instancing! Any time you send data from the CPU to the GPU, you pay a performance cost. Therefore it is better to send batches of data from the CPU to the GPU. With instancing, you can issue a single draw call and request the GPU execute the draw call work multiple times. In this sample, we will render multiple cubes at different locations. Therefore the main difference between the cubes will be their world position. The camera’s transform and the projection matrix will remain the same for all the cubes. Knowing this, we can upload a buffer with 30 unique object to world matrices. The GPU will notify the vertex shader of which instance, via an instance id, of the cube is currently being rendered. Therefore we can use the instance id to index the object to world matrices to uniquely position each cube.
Code:
CGame.h
|
1 2 3 4 5 6 7 8 9 10 11 12 13 14 15 16 17 18 19 20 21 22 23 24 25 26 27 28 29 30 31 32 33 34 35 36 37 38 39 40 41 42 43 44 45 46 47 48 49 50 51 52 53 54 55 56 57 58 59 60 61 62 63 64 65 66 |
#ifndef __CGAME__ #define __CGAME__ #define GLFW_INCLUDE_VULKAN #include <glfw/include/GLFW/glfw3.h> #include "vulkan/VulkanVertexBuffer.h" const int MAX_FRAMES_IN_FLIGHT = 2; class CGame { public: CGame() {} void Initialize(GLFWwindow* window, const unsigned int width, const unsigned int height); void Shutdown(); void Update(); void Render(); void OnResize(int width, int height); private: void InitializeVulkan(const unsigned int width, const unsigned int height); void CreateSemaphores(); void CreateVertexBuffer(); void CreateUniformBuffer(); void CreateDescriptorPool(); void CreateDescriptorSet(); GLFWwindow* m_window; VkInstance m_vkInstance; VkDebugReportCallbackEXT m_vkDebugReportCallbackEXT; VkPhysicalDevice m_vkPhysicalDevice; VkDevice m_vkDevice; VkQueue m_vkGraphicsQueue; VkQueue m_vkPresentQueue; VkSurfaceKHR m_vkSurface; VkSurfaceFormatKHR m_vkSwapChainSurfaceFormat; VkExtent2D m_vkSwapChainExtents; VkSwapchainKHR m_vkSwapChain; std::vector m_vkSwapChainImages; std::vector m_vkSwapChainImageViews; VkShaderModule m_vkVertexShaderModule; VkShaderModule m_vkFragmentShaderModule; VkRenderPass m_vkRenderPass; VkPipelineLayout m_vkPipelineLayout; VkPipeline m_vkGraphicsPipeline; std::vector m_vkSwapChainFrameBuffers; VkCommandPool m_vkCommandPool; std::vector m_vkCommandBuffers; std::vector m_vkImageAvailableSemaphores; std::vector m_vkRenderingFinishedSemaphores; std::vector m_vkInFlightFences; unsigned int m_CurrentFrame; VkDescriptorSetLayout m_vkUBODescriptorSetLayout; VulkanVertexBuffer m_VertexBuffer; VkBuffer m_vkUniformBuffer; VkDeviceMemory m_vkUniformBufferMemory; VkDescriptorPool m_vkDescriptorPool; VkDescriptorSet m_vkDescriptorSet; }; #endif |
CGame.cpp
|
1 2 3 4 5 6 7 8 9 10 11 12 13 14 15 16 17 18 19 20 21 22 23 24 25 26 27 28 29 30 31 32 33 34 35 36 37 38 39 40 41 42 43 44 45 46 47 48 49 50 51 52 53 54 55 56 57 58 59 60 61 62 63 64 65 66 67 68 69 70 71 72 73 74 75 76 77 78 79 80 81 82 83 84 85 86 87 88 89 90 91 92 93 94 95 96 97 98 99 100 101 102 103 104 105 106 107 108 109 110 111 112 113 114 115 116 117 118 119 120 121 122 123 124 125 126 127 128 129 130 131 132 133 134 135 136 137 138 139 140 141 142 143 144 145 146 147 148 149 150 151 152 153 154 155 156 157 158 159 160 161 162 163 164 165 166 167 168 169 170 171 172 173 174 175 176 177 178 179 180 181 182 183 184 185 186 187 188 189 190 191 192 193 194 195 196 197 198 199 200 201 202 203 204 205 206 207 208 209 210 211 212 213 214 215 216 217 218 219 220 221 222 223 224 225 226 227 228 229 230 231 232 233 234 235 236 237 238 239 240 241 242 243 244 245 246 247 248 249 250 251 252 253 254 255 256 257 258 259 260 261 262 263 264 265 266 267 268 269 270 271 272 273 274 275 276 277 278 279 280 281 282 283 284 285 286 287 288 289 290 291 292 293 294 295 296 297 298 299 300 301 302 303 304 305 306 307 308 309 310 311 312 313 314 315 316 317 318 319 320 321 322 323 324 325 326 327 328 329 330 331 332 333 334 335 336 337 338 339 340 341 342 343 344 345 346 347 348 349 350 351 352 353 354 355 356 357 358 359 360 361 362 363 364 365 366 367 368 369 370 |
#include "CGame.h" #include "vulkan/VulkanHelper.h" #include #include #define GLM_FORCE_RADIANS #include <glm/glm.hpp> #include <glm/gtc/matrix_transform.hpp> #include struct UniformBufferObject { glm::mat4 model[30]; glm::mat4 view; glm::mat4 proj; glm::vec2 resolution; float time; }; void LogPhysicalDeviceInformation(VkPhysicalDevice& physicalDevice) { char buffer[500]; #define LOG_MSG(msg) sprintf_s(buffer, "%s\n", msg); printf(buffer); #define LOG_STRING(props, member) sprintf_s(buffer, "%s: %s\n", #member, props.member); printf(buffer); #define LOG_INT(props, member) sprintf_s(buffer, "%s: %d\n", #member, props.member); printf(buffer); VkPhysicalDeviceProperties props; vkGetPhysicalDeviceProperties(physicalDevice, &props); LOG_MSG("[Vulkan] Selected Physical Device Properties"); LOG_INT(props, vendorID); LOG_STRING(props, deviceName); LOG_INT(props, deviceID); switch (props.deviceType) { case VK_PHYSICAL_DEVICE_TYPE_INTEGRATED_GPU: sprintf_s(buffer, "deviceType: VK_PHYSICAL_DEVICE_TYPE_INTEGRATED_GPU\n"); break; case VK_PHYSICAL_DEVICE_TYPE_DISCRETE_GPU: sprintf_s(buffer, "deviceType: VK_PHYSICAL_DEVICE_TYPE_DISCRETE_GPU\n"); break; case VK_PHYSICAL_DEVICE_TYPE_VIRTUAL_GPU: sprintf_s(buffer, "deviceType: VK_PHYSICAL_DEVICE_TYPE_VIRTUAL_GPU\n"); break; case VK_PHYSICAL_DEVICE_TYPE_CPU: sprintf_s(buffer, "deviceType: VK_PHYSICAL_DEVICE_TYPE_CPU\n"); break; case VK_PHYSICAL_DEVICE_TYPE_OTHER: sprintf_s(buffer, "deviceType: VK_PHYSICAL_DEVICE_TYPE_OTHER\n"); break; } printf(buffer); LOG_INT(props, driverVersion); LOG_INT(props, apiVersion); #undef LOG_INT #undef LOG_STRING #undef LOG_MSG } bool g_EnableDebugValidationLayers; void CGame::InitializeVulkan(const unsigned int width, const unsigned int height) { VkResult result = VK_SUCCESS; #ifdef _DEBUG g_EnableDebugValidationLayers = true; #else g_EnableDebugValidationLayers = false; #endif result = CreateVulkanInstance("VulkanApp", g_EnableDebugValidationLayers, &m_vkInstance, &m_vkDebugReportCallbackEXT); result = glfwCreateWindowSurface(m_vkInstance, m_window, nullptr, &m_vkSurface); if( result != VK_SUCCESS) { return; } ChooseBestPhysicalDevice(m_vkInstance, m_vkSurface, m_vkPhysicalDevice); CreateLogicalDevice(m_vkInstance, m_vkPhysicalDevice, m_vkSurface, g_EnableDebugValidationLayers, m_vkDevice, m_vkGraphicsQueue, m_vkPresentQueue); CreateSwapChain(m_vkPhysicalDevice, m_vkDevice, m_vkSurface, width, height, m_vkSwapChainSurfaceFormat, m_vkSwapChainExtents, m_vkSwapChain, m_vkSwapChainImages); CreateSwapChainImageViews(m_vkDevice, m_vkSwapChainImages, m_vkSwapChainSurfaceFormat.format, m_vkSwapChainImageViews); CreateRenderPass(m_vkDevice, m_vkSwapChainSurfaceFormat.format, m_vkRenderPass); CreateDescriptorSetLayout(m_vkDevice, m_vkUBODescriptorSetLayout); CreateGraphicsPipeline(m_vkDevice, m_vkSwapChainExtents, m_vkUBODescriptorSetLayout, m_vkRenderPass, m_vkVertexShaderModule, m_vkFragmentShaderModule, m_vkPipelineLayout, m_vkGraphicsPipeline); CreateSwapChainFrameBuffers(m_vkDevice, m_vkSwapChainImageViews, m_vkRenderPass, m_vkSwapChainExtents, m_vkSwapChainFrameBuffers); CreateCommandPool(m_vkDevice, m_vkPhysicalDevice, m_vkSurface, m_vkCommandPool); CreateVertexBuffer(); CreateUniformBuffer(); CreateDescriptorPool(); CreateDescriptorSet(); CreateCommandBuffers(m_vkDevice, m_vkCommandPool, m_vkSwapChainFrameBuffers, m_vkSwapChainExtents, m_vkGraphicsPipeline, &m_VertexBuffer, m_vkRenderPass, m_vkPipelineLayout, m_vkDescriptorSet, m_vkCommandBuffers); LogPhysicalDeviceInformation(m_vkPhysicalDevice); m_CurrentFrame = 0; } void CGame::CreateSemaphores() { m_vkImageAvailableSemaphores.resize(MAX_FRAMES_IN_FLIGHT); m_vkRenderingFinishedSemaphores.resize(MAX_FRAMES_IN_FLIGHT); m_vkInFlightFences.resize(MAX_FRAMES_IN_FLIGHT); VkSemaphoreCreateInfo createInfo = {}; createInfo.sType = VK_STRUCTURE_TYPE_SEMAPHORE_CREATE_INFO; VkFenceCreateInfo fenceCreateInfo = {}; fenceCreateInfo.sType = VK_STRUCTURE_TYPE_FENCE_CREATE_INFO; fenceCreateInfo.flags = VK_FENCE_CREATE_SIGNALED_BIT; // Create the fence in the signaled state so we don't block the first frame. for (unsigned int i = 0; i < MAX_FRAMES_IN_FLIGHT; ++i) { vkCreateSemaphore(m_vkDevice, &createInfo, nullptr, &m_vkImageAvailableSemaphores[i]); vkCreateSemaphore(m_vkDevice, &createInfo, nullptr, &m_vkRenderingFinishedSemaphores[i]); vkCreateFence(m_vkDevice, &fenceCreateInfo, nullptr, &m_vkInFlightFences[i]); } } void CGame::CreateVertexBuffer() { const float s = 0.5f; std::vector vertices = { // 0 - 3 { { -s, s, s }, { 0,1,1 }, {0,0} }, { { -s, -s, s }, { 0,0,1 }, {0,1} }, { { s, s, s }, { 1,1,1 }, {1,0} }, { { s, -s, s }, { 1,0,1 }, {1,1} }, // 4 - 5 { { s, s, -s },{ 1,1,0 },{ 1,0 } }, { { s, -s, -s },{ 1,0,0 },{ 1,1 } }, // 6 - 7 { {-s, s, -s },{ 0,1,0 },{ 1,0 } }, { { -s, -s, -s },{ 0,0,0 },{ 1,1 } }, }; std::vector indices = { // Front 0,1,2, 1,3,2, // Right 4,2,3, 4,3,5, // Back 4,5,6, 5,7,6, // Right 6,7,0, 1,0,7, // Top 6,0,4, 0,2,4, // Bottom 1,7,5, 1,5,3 }; m_VertexBuffer.Initialize(m_vkDevice, m_vkPhysicalDevice, m_vkGraphicsQueue, m_vkCommandPool); m_VertexBuffer.SetMeshData(vertices, indices); m_VertexBuffer.Build(); } void CGame::CreateUniformBuffer() { VkDeviceSize size = sizeof(UniformBufferObject); CreateBuffer(m_vkDevice, m_vkPhysicalDevice, size, VK_BUFFER_USAGE_UNIFORM_BUFFER_BIT, VK_MEMORY_PROPERTY_HOST_VISIBLE_BIT | VK_MEMORY_PROPERTY_HOST_COHERENT_BIT, m_vkUniformBuffer, m_vkUniformBufferMemory); } void CGame::CreateDescriptorPool() { VkResult result = VK_SUCCESS; VkDescriptorPoolSize poolSize = {}; poolSize.type = VK_DESCRIPTOR_TYPE_UNIFORM_BUFFER; poolSize.descriptorCount = 1; VkDescriptorPoolCreateInfo poolInfo = {}; poolInfo.sType = VK_STRUCTURE_TYPE_DESCRIPTOR_POOL_CREATE_INFO; poolInfo.poolSizeCount = 1; poolInfo.pPoolSizes = &poolSize; poolInfo.maxSets = 1; result = vkCreateDescriptorPool(m_vkDevice, &poolInfo, nullptr, &m_vkDescriptorPool); } void CGame::CreateDescriptorSet() { VkResult result = VK_SUCCESS; VkDescriptorSetLayout layouts[] = { m_vkUBODescriptorSetLayout }; VkDescriptorSetAllocateInfo allocInfo = {}; allocInfo.sType = VK_STRUCTURE_TYPE_DESCRIPTOR_SET_ALLOCATE_INFO; allocInfo.descriptorPool = m_vkDescriptorPool; allocInfo.descriptorSetCount = 1; allocInfo.pSetLayouts = layouts; result = vkAllocateDescriptorSets(m_vkDevice, &allocInfo, &m_vkDescriptorSet); VkDescriptorBufferInfo bufferInfo = {}; bufferInfo.buffer = m_vkUniformBuffer; bufferInfo.offset = 0; bufferInfo.range = sizeof(UniformBufferObject); VkWriteDescriptorSet descriptorWrite = {}; descriptorWrite.sType = VK_STRUCTURE_TYPE_WRITE_DESCRIPTOR_SET; descriptorWrite.dstSet = m_vkDescriptorSet; descriptorWrite.dstBinding = 0; descriptorWrite.dstArrayElement = 0; descriptorWrite.descriptorCount = 1; descriptorWrite.descriptorType = VK_DESCRIPTOR_TYPE_UNIFORM_BUFFER; descriptorWrite.pBufferInfo = &bufferInfo; descriptorWrite.pImageInfo = nullptr; descriptorWrite.pTexelBufferView = nullptr; vkUpdateDescriptorSets(m_vkDevice, 1, &descriptorWrite, 0, nullptr); } void CGame::Initialize(GLFWwindow* window, const unsigned int width, const unsigned int height) { m_window = window; InitializeVulkan(width, height); CreateSemaphores(); } void CGame::Shutdown() { vkDeviceWaitIdle(m_vkDevice); m_VertexBuffer.Shutdown(); vkDestroyDescriptorPool(m_vkDevice, m_vkDescriptorPool, nullptr); vkDestroyDescriptorSetLayout(m_vkDevice, m_vkUBODescriptorSetLayout, nullptr); vkDestroyBuffer(m_vkDevice, m_vkUniformBuffer, nullptr); vkFreeMemory(m_vkDevice, m_vkUniformBufferMemory, nullptr); for (int i = 0; i < MAX_FRAMES_IN_FLIGHT; ++i) { vkDestroySemaphore(m_vkDevice, m_vkImageAvailableSemaphores[i], nullptr); vkDestroySemaphore(m_vkDevice, m_vkRenderingFinishedSemaphores[i], nullptr); vkDestroyFence(m_vkDevice, m_vkInFlightFences[i], nullptr); } m_vkImageAvailableSemaphores.clear(); m_vkRenderingFinishedSemaphores.clear(); m_vkInFlightFences.clear(); vkDestroyCommandPool(m_vkDevice, m_vkCommandPool, nullptr); for(auto& framebuffer : m_vkSwapChainFrameBuffers) { vkDestroyFramebuffer(m_vkDevice, framebuffer, nullptr); } m_vkSwapChainFrameBuffers.clear(); vkDestroyPipeline(m_vkDevice, m_vkGraphicsPipeline, nullptr); vkDestroyPipelineLayout(m_vkDevice, m_vkPipelineLayout, nullptr); vkDestroyRenderPass(m_vkDevice, m_vkRenderPass, nullptr); vkDestroyShaderModule(m_vkDevice, m_vkVertexShaderModule, nullptr); vkDestroyShaderModule(m_vkDevice, m_vkFragmentShaderModule, nullptr); for(const auto& imageView : m_vkSwapChainImageViews) { vkDestroyImageView(m_vkDevice, imageView, nullptr); } vkDestroySwapchainKHR(m_vkDevice, m_vkSwapChain, nullptr); vkDestroySurfaceKHR(m_vkInstance, m_vkSurface, nullptr); vkDestroyDevice(m_vkDevice, nullptr); if(g_EnableDebugValidationLayers) DestroyDebugReportCallbackEXT(m_vkInstance, m_vkDebugReportCallbackEXT); vkDestroyInstance(m_vkInstance, 0); } void CGame::OnResize(int width, int height) { } void CGame::Update() { static auto startTime = std::chrono::high_resolution_clock::now(); auto currentTime = std::chrono::high_resolution_clock::now(); float time = std::chrono::duration<float, std::chrono::seconds::period>(currentTime - startTime).count(); UniformBufferObject ubo = {}; float scale = 0.5f; glm::mat4 rotationMatrix = glm::rotate(glm::mat4(1.0f), time * glm::radians(90.0f), glm::vec3(1.0f, 1.0f, 1.0f)); glm::mat4 scaleMatrix = glm::scale(glm::mat4(1.0f), glm::vec3(scale, scale, scale)); glm::mat4 scaleAndRotationMatrix = scaleMatrix * rotationMatrix; float xOffset = -2.5f; float yOffset = 2.0f; for (int x = 0; x < 30; ++x) { if( x > 0 && x % 6 == 0) { xOffset = -2.5f; yOffset -= 1.0f; } ubo.model[x] = glm::translate(glm::mat4(1.0f), glm::vec3(xOffset, yOffset, 0)) * scaleAndRotationMatrix; xOffset += 1.0f; } ubo.view = glm::lookAt(glm::vec3(0, 0, 6), glm::vec3(0, 0, 0), glm::vec3(0, 1, 0)); ubo.proj = glm::perspective(glm::radians(45.0f), m_vkSwapChainExtents.width / static_cast(m_vkSwapChainExtents.height), 0.1f, 10.0f); ubo.proj[1][1] *= -1; ubo.resolution = glm::vec2(m_vkSwapChainExtents.width, m_vkSwapChainExtents.height); ubo.time = time; void* data; vkMapMemory(m_vkDevice, m_vkUniformBufferMemory, 0, sizeof(ubo), 0, &data); memcpy(data, &ubo, sizeof(ubo)); vkUnmapMemory(m_vkDevice, m_vkUniformBufferMemory); } void CGame::Render() { VkResult result = VK_SUCCESS; vkWaitForFences(m_vkDevice, 1, &m_vkInFlightFences[m_CurrentFrame], VK_TRUE, std::numeric_limits::max()); vkResetFences(m_vkDevice, 1, &m_vkInFlightFences[m_CurrentFrame]); unsigned int imageIndex; result = vkAcquireNextImageKHR(m_vkDevice, m_vkSwapChain, std::numeric_limits::max(), m_vkImageAvailableSemaphores[m_CurrentFrame], VK_NULL_HANDLE, &imageIndex); VkSubmitInfo submitInfo = {}; submitInfo.sType = VK_STRUCTURE_TYPE_SUBMIT_INFO; VkSemaphore waitSemaphores[] = { m_vkImageAvailableSemaphores[m_CurrentFrame] }; VkPipelineStageFlags waitStages[] = { VK_PIPELINE_STAGE_TOP_OF_PIPE_BIT }; submitInfo.waitSemaphoreCount = 1; submitInfo.pWaitSemaphores = waitSemaphores; submitInfo.pWaitDstStageMask = waitStages; submitInfo.commandBufferCount = 1; submitInfo.pCommandBuffers = &m_vkCommandBuffers[imageIndex]; VkSemaphore signalSemaphores[] = { m_vkRenderingFinishedSemaphores[m_CurrentFrame] }; submitInfo.signalSemaphoreCount = 1; submitInfo.pSignalSemaphores = signalSemaphores; vkQueueSubmit(m_vkGraphicsQueue, 1, &submitInfo, m_vkInFlightFences[m_CurrentFrame]); VkPresentInfoKHR presentInfo = {}; presentInfo.sType = VK_STRUCTURE_TYPE_PRESENT_INFO_KHR; presentInfo.waitSemaphoreCount = 1; presentInfo.pWaitSemaphores = signalSemaphores; VkSwapchainKHR swapChains[] = { m_vkSwapChain }; presentInfo.swapchainCount = 1; presentInfo.pSwapchains = swapChains; presentInfo.pImageIndices = &imageIndex; presentInfo.pResults = nullptr; vkQueuePresentKHR(m_vkGraphicsQueue, &presentInfo); m_CurrentFrame = (m_CurrentFrame + 1) % MAX_FRAMES_IN_FLIGHT; } |
VulkanHelper.h
|
1 2 3 4 5 6 7 8 9 10 11 12 13 14 15 16 17 18 19 20 21 22 23 24 25 26 27 28 29 30 31 32 33 34 35 36 37 38 39 |
#ifndef __VULKAN_HELPER__ #define __VULKAN_HELPER__ #define GLFW_INCLUDE_VULKAN #include <glfw/include/GLFW/glfw3.h> #include #include class VulkanVertexBuffer; void GetAvailableExtensions(unsigned int& extensionCount, std::vector& extensions); void GetAvailableValidationLayers(unsigned int& validationLayerCount, std::vector& layers); VkResult CreateVulkanInstance(const char* applicationName, bool enableDebugValidationLayers, VkInstance *instance, VkDebugReportCallbackEXT* callback); VkResult GetAvailablePhysicalDevices(VkInstance& instance, std::vector& physicalDevices); bool IsPhysicalDeviceSuitable(VkPhysicalDevice& device, VkSurfaceKHR& surface); void ChooseBestPhysicalDevice(VkInstance& instance, VkSurfaceKHR& surface, VkPhysicalDevice& physicalDevice); void CreateLogicalDevice(VkInstance& instance, VkPhysicalDevice& physicalDevice, VkSurfaceKHR& surface, bool enableDebugValidationLayers, VkDevice& logicalDevice, VkQueue& graphicsQueue, VkQueue& presentQueue); bool CreateSwapChain(VkPhysicalDevice& physicalDevice, VkDevice& logicalDevice, VkSurfaceKHR& surface, const unsigned int requestedWidth, const unsigned int requestedHeight, VkSurfaceFormatKHR& swapChainSurfaceFormat, VkExtent2D& swapChainExtents, VkSwapchainKHR& swapChain, std::vector& swapChainImages); VkSurfaceFormatKHR ChooseSwapSurfaceFormat(const std::vector availableFormats); VkPresentModeKHR ChooseSwapPresentMode(const std::vector availablePresentModes); VkExtent2D ChooseSwapExtent(const VkSurfaceCapabilitiesKHR& capabilities, const unsigned int width, const unsigned int height); void CreateSwapChainImageViews(VkDevice& logicalDevice, std::vector& swapChainImages, VkFormat& swapChainFormat, std::vector& swapChainImageViews); void CreateRenderPass(VkDevice& logicalDevice, const VkFormat& imageFormat, VkRenderPass& renderPass); void CreateGraphicsPipeline(VkDevice& logicalDevice, const VkExtent2D& resolution, const VkDescriptorSetLayout& descriptorSetLayout, const VkRenderPass& renderPass, VkShaderModule& vertexShaderModule, VkShaderModule& fragmentShaderModule, VkPipelineLayout& pipelineLayout, VkPipeline& graphicsPipeline); VkResult CreateShaderModule(VkDevice& logicalDevice, std::vector shaderByteCode, VkShaderModule& shaderModule); void CreateSwapChainFrameBuffers(VkDevice& logicalDevice, const std::vector& swapChainImageViews, const VkRenderPass& renderPass, const VkExtent2D& resolution, std::vector& swapChainFrameBuffers); void CreateCommandPool(VkDevice& logicalDevice, const VkPhysicalDevice& physicalDevice, const VkSurfaceKHR& surface, VkCommandPool& commandPool); void CreateCommandBuffers(const VkDevice& logicalDevice, VkCommandPool& commandPool, std::vector& swapChainFramebuffers, VkExtent2D& resolution, VkPipeline graphicsPipeline, VulkanVertexBuffer* vulkanVertexBuffer, VkRenderPass& renderPass, VkPipelineLayout& pipelineLayout, VkDescriptorSet& descriptorSet, std::vector& commandBuffers); void CreateBuffer(VkDevice& logicalDevice, VkPhysicalDevice& physicalDevice, VkDeviceSize size, VkBufferUsageFlags usage, VkMemoryPropertyFlags properties, VkBuffer& buffer, VkDeviceMemory& bufferMemory); bool FindMemoryType(VkPhysicalDevice& physicalDevice, unsigned int typeFilter, VkMemoryPropertyFlags properties, unsigned int& memoryType); void CopyBuffer(VkDevice& logicalDevice, VkQueue& graphicsQueue, VkCommandPool& commandPool, VkBuffer& srcBuffer, VkBuffer& dstBuffer, VkDeviceSize& size); void CreateDescriptorSetLayout(VkDevice& logicalDevice, VkDescriptorSetLayout& descriptorSetLayout); void DestroyDebugReportCallbackEXT(VkInstance& instance, VkDebugReportCallbackEXT& callback); #endif |
VulkanHelper.cpp
|
1 2 3 4 5 6 7 8 9 10 11 12 13 14 15 16 17 18 19 20 21 22 23 24 25 26 27 28 29 30 31 32 33 34 35 36 37 38 39 40 41 42 43 44 45 46 47 48 49 50 51 52 53 54 55 56 57 58 59 60 61 62 63 64 65 66 67 68 69 70 71 72 73 74 75 76 77 78 79 80 81 82 83 84 85 86 87 88 89 90 91 92 93 94 95 96 97 98 99 100 101 102 103 104 105 106 107 108 109 110 111 112 113 114 115 116 117 118 119 120 121 122 123 124 125 126 127 128 129 130 131 132 133 134 135 136 137 138 139 140 141 142 143 144 145 146 147 148 149 150 151 152 153 154 155 156 157 158 159 160 161 162 163 164 165 166 167 168 169 170 171 172 173 174 175 176 177 178 179 180 181 182 183 184 185 186 187 188 189 190 191 192 193 194 195 196 197 198 199 200 201 202 203 204 205 206 207 208 209 210 211 212 213 214 215 216 217 218 219 220 221 222 223 224 225 226 227 228 229 230 231 232 233 234 235 236 237 238 239 240 241 242 243 244 245 246 247 248 249 250 251 252 253 254 255 256 257 258 259 260 261 262 263 264 265 266 267 268 269 270 271 272 273 274 275 276 277 278 279 280 281 282 283 284 285 286 287 288 289 290 291 292 293 294 295 296 297 298 299 300 301 302 303 304 305 306 307 308 309 310 311 312 313 314 315 316 317 318 319 320 321 322 323 324 325 326 327 328 329 330 331 332 333 334 335 336 337 338 339 340 341 342 343 344 345 346 347 348 349 350 351 352 353 354 355 356 357 358 359 360 361 362 363 364 365 366 367 368 369 370 371 372 373 374 375 376 377 378 379 380 381 382 383 384 385 386 387 388 389 390 391 392 393 394 395 396 397 398 399 400 401 402 403 404 405 406 407 408 409 410 411 412 413 414 415 416 417 418 419 420 421 422 423 424 425 426 427 428 429 430 431 432 433 434 435 436 437 438 439 440 441 442 443 444 445 446 447 448 449 450 451 452 453 454 455 456 457 458 459 460 461 462 463 464 465 466 467 468 469 470 471 472 473 474 475 476 477 478 479 480 481 482 483 484 485 486 487 488 489 490 491 492 493 494 495 496 497 498 499 500 501 502 503 504 505 506 507 508 509 510 511 512 513 514 515 516 517 518 519 520 521 522 523 524 525 526 527 528 529 530 531 532 533 534 535 536 537 538 539 540 541 542 543 544 545 546 547 548 549 550 551 552 553 554 555 556 557 558 559 560 561 562 563 564 565 566 567 568 569 570 571 572 573 574 575 576 577 578 579 580 581 582 583 584 585 586 587 588 589 590 591 592 593 594 595 596 597 598 599 600 601 602 603 604 605 606 607 608 609 610 611 612 613 614 615 616 617 618 619 620 |
#include "VulkanHelper.h" #include "VulkanVertexBuffer.h" #include #include #include #include #include const std::vector validationLayers = { "VK_LAYER_LUNARG_standard_validation" }; const std::vector extensions = { "VK_EXT_debug_report", "VK_KHR_surface", "VK_KHR_win32_surface" }; const std::vector logicalDeviceExtensions = { "VK_KHR_swapchain" }; struct QueueFamilyIndices { int graphicsFamily = -1; int presentFamily = -1; bool isComplete() { return graphicsFamily >= 0 && presentFamily >= 0; } }; struct SwapChainSupportDetails { VkSurfaceCapabilitiesKHR capabilities; std::vector formats; std::vector presentModes; }; static VKAPI_ATTR VkBool32 VKAPI_CALL debugCallback( VkDebugReportFlagsEXT flags, VkDebugReportObjectTypeEXT objType, uint64_t obj, size_t location, int32_t code, const char* layerPrefix, const char* msg, void* userData) { char buffer[500]; sprintf_s(buffer, "[VULKAN] Validation Layer: %s\n", msg); std::cerr << buffer; std::cout << buffer; return VK_FALSE; } VkResult CreateDebugReportCallbackEXT(VkInstance instance, const VkDebugReportCallbackCreateInfoEXT* pCreateInfo, const VkAllocationCallbacks* pAllocator, VkDebugReportCallbackEXT* pCallback) { auto func = (PFN_vkCreateDebugReportCallbackEXT)vkGetInstanceProcAddr(instance, "vkCreateDebugReportCallbackEXT"); if (func != nullptr) { return func(instance, pCreateInfo, pAllocator, pCallback); } else { return VK_ERROR_EXTENSION_NOT_PRESENT; } } void DestroyDebugReportCallbackEXT(VkInstance instance, VkDebugReportCallbackEXT* pCallback, const VkAllocationCallbacks* pAllocator) { auto func = (PFN_vkDestroyDebugReportCallbackEXT)vkGetInstanceProcAddr(instance, "vkDestroyDebugReportCallbackEXT"); if (func != nullptr) { func(instance, *pCallback, pAllocator); } } void LoadBinaryFile(const char* filename, std::vector& buffer) { std::ifstream fileStream(filename, std::ios::ate | std::ios::binary); int fileLength = static_cast(fileStream.tellg()); fileStream.seekg(0); buffer.resize(fileLength); fileStream.read(buffer.data(), fileLength); fileStream.close(); } VkResult CreateShaderModule(VkDevice& logicalDevice, std::vector shaderByteCode, VkShaderModule& shaderModule) { VkResult result = VK_SUCCESS; VkShaderModuleCreateInfo createInfo = {}; createInfo.sType = VK_STRUCTURE_TYPE_SHADER_MODULE_CREATE_INFO; createInfo.codeSize = shaderByteCode.size(); createInfo.pCode = reinterpret_cast(shaderByteCode.data()); result = vkCreateShaderModule(logicalDevice, &createInfo, nullptr, &shaderModule); return result; } void CreateRenderPass(VkDevice& logicalDevice, const VkFormat& imageFormat, VkRenderPass& renderPass) { VkResult result = VK_SUCCESS; VkAttachmentDescription colorAttachment = {}; colorAttachment.format = imageFormat; colorAttachment.samples = VK_SAMPLE_COUNT_1_BIT; colorAttachment.loadOp = VK_ATTACHMENT_LOAD_OP_CLEAR; colorAttachment.storeOp = VK_ATTACHMENT_STORE_OP_STORE; colorAttachment.initialLayout = VK_IMAGE_LAYOUT_UNDEFINED; colorAttachment.finalLayout = VK_IMAGE_LAYOUT_PRESENT_SRC_KHR; VkAttachmentReference colorAttachmentRef = {}; colorAttachmentRef.attachment = 0; colorAttachmentRef.layout = VK_IMAGE_LAYOUT_COLOR_ATTACHMENT_OPTIMAL; VkSubpassDescription subpass = {}; subpass.pipelineBindPoint = VK_PIPELINE_BIND_POINT_GRAPHICS; subpass.colorAttachmentCount = 1; subpass.pColorAttachments = &colorAttachmentRef; VkRenderPassCreateInfo renderPassInfo = {}; renderPassInfo.sType = VK_STRUCTURE_TYPE_RENDER_PASS_CREATE_INFO; renderPassInfo.attachmentCount = 1; renderPassInfo.pAttachments = &colorAttachment; renderPassInfo.subpassCount = 1; renderPassInfo.pSubpasses = &subpass; result = vkCreateRenderPass(logicalDevice, &renderPassInfo, nullptr, &renderPass); } void CreateGraphicsPipeline(VkDevice& logicalDevice, const VkExtent2D& resolution, const VkDescriptorSetLayout& descriptorSetLayout, const VkRenderPass& renderPass, VkShaderModule& vertexShaderModule, VkShaderModule& fragmentShaderModule, VkPipelineLayout& pipelineLayout, VkPipeline& graphicsPipeline) { VkResult result = VK_SUCCESS; std::vector vertexShaderByteCode; std::vector fragmentShaderByteCode; LoadBinaryFile("assets/shaders/vert.spv", vertexShaderByteCode); LoadBinaryFile("assets/shaders/frag.spv", fragmentShaderByteCode); CreateShaderModule(logicalDevice, vertexShaderByteCode, vertexShaderModule); CreateShaderModule(logicalDevice, fragmentShaderByteCode, fragmentShaderModule); VkPipelineShaderStageCreateInfo vertexShaderStageCreateInfo = {}; vertexShaderStageCreateInfo.sType = VK_STRUCTURE_TYPE_PIPELINE_SHADER_STAGE_CREATE_INFO; vertexShaderStageCreateInfo.stage = VK_SHADER_STAGE_VERTEX_BIT; vertexShaderStageCreateInfo.module = vertexShaderModule; vertexShaderStageCreateInfo.pName = "main"; VkPipelineShaderStageCreateInfo fragmentShaderStageCreateInfo = {}; fragmentShaderStageCreateInfo.sType = VK_STRUCTURE_TYPE_PIPELINE_SHADER_STAGE_CREATE_INFO; fragmentShaderStageCreateInfo.stage = VK_SHADER_STAGE_FRAGMENT_BIT; fragmentShaderStageCreateInfo.module = fragmentShaderModule; fragmentShaderStageCreateInfo.pName = "main"; VkPipelineShaderStageCreateInfo shaderStages[] = { vertexShaderStageCreateInfo, fragmentShaderStageCreateInfo }; auto vertexBindingDescription = Vertex::GetBindingDescription(); auto vertexAttributeDescriptions = Vertex::GetAttributeDesciptions(); VkPipelineVertexInputStateCreateInfo vertexInputInfo = {}; vertexInputInfo.sType = VK_STRUCTURE_TYPE_PIPELINE_VERTEX_INPUT_STATE_CREATE_INFO; vertexInputInfo.vertexBindingDescriptionCount = 1; vertexInputInfo.pVertexBindingDescriptions = &vertexBindingDescription; vertexInputInfo.vertexAttributeDescriptionCount = static_cast(vertexAttributeDescriptions.size()); vertexInputInfo.pVertexAttributeDescriptions = vertexAttributeDescriptions.data(); VkPipelineInputAssemblyStateCreateInfo inputAssembly = {}; inputAssembly.sType = VK_STRUCTURE_TYPE_PIPELINE_INPUT_ASSEMBLY_STATE_CREATE_INFO; inputAssembly.topology = VK_PRIMITIVE_TOPOLOGY_TRIANGLE_LIST; inputAssembly.primitiveRestartEnable = VK_FALSE; VkViewport viewport = {}; viewport.x = 0.0f; viewport.y = 0.0f; viewport.width = static_cast(resolution.width); viewport.height = static_cast(resolution.height); viewport.minDepth = 0.0f; viewport.maxDepth = 1.0f; VkRect2D scissorRect = {}; scissorRect.offset = { 0,0 }; scissorRect.extent = resolution; VkPipelineViewportStateCreateInfo viewportState = {}; viewportState.sType = VK_STRUCTURE_TYPE_PIPELINE_VIEWPORT_STATE_CREATE_INFO; viewportState.viewportCount = 1; viewportState.pViewports = &viewport; viewportState.scissorCount = 1; viewportState.pScissors = &scissorRect; VkPipelineRasterizationStateCreateInfo rasterizer = {}; rasterizer.sType = VK_STRUCTURE_TYPE_PIPELINE_RASTERIZATION_STATE_CREATE_INFO; rasterizer.depthClampEnable = VK_FALSE; rasterizer.rasterizerDiscardEnable = VK_FALSE; rasterizer.polygonMode = VK_POLYGON_MODE_FILL; rasterizer.lineWidth = 1.0f; rasterizer.cullMode = VK_CULL_MODE_BACK_BIT; rasterizer.frontFace = VK_FRONT_FACE_COUNTER_CLOCKWISE; rasterizer.depthBiasEnable = VK_FALSE; rasterizer.depthBiasConstantFactor = 0.0f; rasterizer.depthBiasClamp = 0.0f; rasterizer.depthBiasSlopeFactor = 0.0f; // TODO: Enable Multi-sampling // TODO: Enable Depth and Stencil Testing VkPipelineColorBlendAttachmentState colorBlendAttachment = {}; colorBlendAttachment.colorWriteMask = VK_COLOR_COMPONENT_R_BIT | VK_COLOR_COMPONENT_G_BIT | VK_COLOR_COMPONENT_B_BIT | VK_COLOR_COMPONENT_A_BIT; colorBlendAttachment.blendEnable = VK_FALSE; VkPipelineColorBlendStateCreateInfo colorBlendingInfo = {}; colorBlendingInfo.sType = VK_STRUCTURE_TYPE_PIPELINE_COLOR_BLEND_STATE_CREATE_INFO; colorBlendingInfo.logicOpEnable = VK_FALSE; colorBlendingInfo.attachmentCount = 1; colorBlendingInfo.pAttachments = &colorBlendAttachment; VkPipelineMultisampleStateCreateInfo multisampleInfo = {}; multisampleInfo.sType = VK_STRUCTURE_TYPE_PIPELINE_MULTISAMPLE_STATE_CREATE_INFO; multisampleInfo.sampleShadingEnable = VK_FALSE; multisampleInfo.rasterizationSamples = VK_SAMPLE_COUNT_1_BIT; VkPipelineLayoutCreateInfo pipelineLayoutInfo = {}; pipelineLayoutInfo.sType = VK_STRUCTURE_TYPE_PIPELINE_LAYOUT_CREATE_INFO; pipelineLayoutInfo.setLayoutCount = 1; pipelineLayoutInfo.pSetLayouts = &descriptorSetLayout; pipelineLayoutInfo.pushConstantRangeCount = 0; pipelineLayoutInfo.pPushConstantRanges = nullptr; result = vkCreatePipelineLayout(logicalDevice, &pipelineLayoutInfo, nullptr, &pipelineLayout); VkGraphicsPipelineCreateInfo pipelineInfo = {}; pipelineInfo.sType = VK_STRUCTURE_TYPE_GRAPHICS_PIPELINE_CREATE_INFO; pipelineInfo.stageCount = 2; pipelineInfo.pStages = shaderStages; pipelineInfo.pVertexInputState = &vertexInputInfo; pipelineInfo.pInputAssemblyState = &inputAssembly; pipelineInfo.pViewportState = &viewportState; pipelineInfo.pRasterizationState = &rasterizer; pipelineInfo.pMultisampleState = &multisampleInfo; pipelineInfo.pDepthStencilState = nullptr; pipelineInfo.pColorBlendState = &colorBlendingInfo; pipelineInfo.pDynamicState = nullptr; pipelineInfo.layout = pipelineLayout; pipelineInfo.renderPass = renderPass; pipelineInfo.subpass = 0; pipelineInfo.basePipelineHandle = VK_NULL_HANDLE; pipelineInfo.basePipelineIndex = -1; result = vkCreateGraphicsPipelines(logicalDevice, VK_NULL_HANDLE, 1, &pipelineInfo, nullptr, &graphicsPipeline); } void CreateSwapChainFrameBuffers(VkDevice& logicalDevice, const std::vector& swapChainImageViews, const VkRenderPass& renderPass, const VkExtent2D& resolution, std::vector& swapChainFrameBuffers) { VkResult result = VK_SUCCESS; swapChainFrameBuffers.resize(swapChainImageViews.size()); for (unsigned int i = 0; i < swapChainImageViews.size(); ++i) { VkImageView attachments[] = { swapChainImageViews[i] }; VkFramebufferCreateInfo frameBufferInfo = {}; frameBufferInfo.sType = VK_STRUCTURE_TYPE_FRAMEBUFFER_CREATE_INFO; frameBufferInfo.renderPass = renderPass; frameBufferInfo.attachmentCount = 1; frameBufferInfo.pAttachments = attachments; frameBufferInfo.width = resolution.width; frameBufferInfo.height = resolution.height; frameBufferInfo.layers = 1; result = vkCreateFramebuffer(logicalDevice, &frameBufferInfo, nullptr, &swapChainFrameBuffers[i]); } } void GetAvailableExtensions(unsigned int& extensionCount, std::vector& extensions) { VkResult result; result = vkEnumerateInstanceExtensionProperties(nullptr, &extensionCount, nullptr); extensions.resize(extensionCount); result = vkEnumerateInstanceExtensionProperties(nullptr, &extensionCount, extensions.data()); } bool CheckDeviceExtensionSupport(VkPhysicalDevice physicalDevice) { uint32_t extensionCount; vkEnumerateDeviceExtensionProperties(physicalDevice, nullptr, &extensionCount, nullptr); std::vector availableExtensions(extensionCount); vkEnumerateDeviceExtensionProperties(physicalDevice, nullptr, &extensionCount, availableExtensions.data()); std::set requiredExtensions(logicalDeviceExtensions.begin(), logicalDeviceExtensions.end()); for (const auto& extension : availableExtensions) { requiredExtensions.erase(extension.extensionName); } return requiredExtensions.empty(); } void GetAvailableValidationLayers(unsigned int& validationLayerCount, std::vector& layers) { VkResult result; result = vkEnumerateInstanceLayerProperties(&validationLayerCount, nullptr); layers.resize(validationLayerCount); result = vkEnumerateInstanceLayerProperties(&validationLayerCount, layers.data()); } QueueFamilyIndices FindQueueFamilies(const VkPhysicalDevice& device, const VkSurfaceKHR& surface) { QueueFamilyIndices indices; unsigned int queueFamilyCount = 0; vkGetPhysicalDeviceQueueFamilyProperties(device, &queueFamilyCount, nullptr); std::vector queueFamilies(queueFamilyCount); vkGetPhysicalDeviceQueueFamilyProperties(device, &queueFamilyCount, queueFamilies.data()); int i = 0; for(const auto& queueFamily : queueFamilies) { if(queueFamily.queueCount > 0 && queueFamily.queueFlags & VK_QUEUE_GRAPHICS_BIT) { indices.graphicsFamily = i; } VkBool32 presentSupport = false; vkGetPhysicalDeviceSurfaceSupportKHR(device, i, surface, &presentSupport); if(queueFamily.queueCount > 0 && presentSupport) { indices.presentFamily = i; } if(indices.isComplete()) { break; } ++i; } return indices; } void CreateCommandPool(VkDevice& logicalDevice, const VkPhysicalDevice& physicalDevice, const VkSurfaceKHR& surface, VkCommandPool& commandPool) { VkResult result = VK_SUCCESS; QueueFamilyIndices indices = FindQueueFamilies(physicalDevice, surface); VkCommandPoolCreateInfo commandPoolInfo = {}; commandPoolInfo.sType = VK_STRUCTURE_TYPE_COMMAND_POOL_CREATE_INFO; commandPoolInfo.queueFamilyIndex = indices.graphicsFamily; commandPoolInfo.flags = 0; result = vkCreateCommandPool(logicalDevice, &commandPoolInfo, nullptr, &commandPool); } void CreateCommandBuffers(const VkDevice& logicalDevice, VkCommandPool& commandPool, std::vector& swapChainFramebuffers, VkExtent2D& resolution, VkPipeline graphicsPipeline, VulkanVertexBuffer* vulkanVertexBuffer, VkRenderPass& renderPass, VkPipelineLayout& pipelineLayout, VkDescriptorSet& descriptorSet, std::vector& commandBuffers) { VkResult result = VK_SUCCESS; commandBuffers.resize(swapChainFramebuffers.size()); VkCommandBufferAllocateInfo allocInfo = {}; allocInfo.sType = VK_STRUCTURE_TYPE_COMMAND_BUFFER_ALLOCATE_INFO; allocInfo.commandBufferCount = static_cast(commandBuffers.size()); allocInfo.commandPool = commandPool; allocInfo.level = VK_COMMAND_BUFFER_LEVEL_PRIMARY; result = vkAllocateCommandBuffers(logicalDevice, &allocInfo, commandBuffers.data()); for(unsigned int i=0; i < commandBuffers.size(); ++i) { VkCommandBufferBeginInfo beginInfo = {}; beginInfo.sType = VK_STRUCTURE_TYPE_COMMAND_BUFFER_BEGIN_INFO; beginInfo.flags = VK_COMMAND_BUFFER_USAGE_SIMULTANEOUS_USE_BIT; beginInfo.pInheritanceInfo = nullptr; result = vkBeginCommandBuffer(commandBuffers[i], &beginInfo); VkRenderPassBeginInfo renderPassBeginInfo = {}; renderPassBeginInfo.sType = VK_STRUCTURE_TYPE_RENDER_PASS_BEGIN_INFO; renderPassBeginInfo.renderPass = renderPass; renderPassBeginInfo.framebuffer = swapChainFramebuffers[i]; renderPassBeginInfo.renderArea.offset = { 0,0 }; renderPassBeginInfo.renderArea.extent = resolution; VkClearValue clearColor = { 0,0,0,1 }; renderPassBeginInfo.clearValueCount = 1; renderPassBeginInfo.pClearValues = &clearColor; vkCmdBeginRenderPass(commandBuffers[i], &renderPassBeginInfo, VK_SUBPASS_CONTENTS_INLINE); vkCmdBindPipeline(commandBuffers[i], VK_PIPELINE_BIND_POINT_GRAPHICS, graphicsPipeline); VkBuffer vertexBuffers[] = { vulkanVertexBuffer->GetVulkanVertexBuffer() }; VkDeviceSize offsets[] = { 0 }; vkCmdBindVertexBuffers(commandBuffers[i], 0, 1, vertexBuffers, offsets); vkCmdBindIndexBuffer(commandBuffers[i], vulkanVertexBuffer->GetVulkanIndexBuffer(), 0, VK_INDEX_TYPE_UINT16); vkCmdBindDescriptorSets(commandBuffers[i], VK_PIPELINE_BIND_POINT_GRAPHICS, pipelineLayout, 0, 1, &descriptorSet, 0, nullptr); vkCmdDrawIndexed(commandBuffers[i], static_cast(vulkanVertexBuffer->GetIndexCount()), 30, 0, 0, 0); vkCmdEndRenderPass(commandBuffers[i]); result = vkEndCommandBuffer(commandBuffers[i]); } } SwapChainSupportDetails QuerySwapChainSupport(VkPhysicalDevice& physicalDevice, VkSurfaceKHR& surface) { SwapChainSupportDetails details; vkGetPhysicalDeviceSurfaceCapabilitiesKHR(physicalDevice, surface, &details.capabilities); unsigned int formatCount = 0; vkGetPhysicalDeviceSurfaceFormatsKHR(physicalDevice, surface, &formatCount, nullptr); if (formatCount != 0) { details.formats.resize(formatCount); vkGetPhysicalDeviceSurfaceFormatsKHR(physicalDevice, surface, &formatCount, details.formats.data()); } unsigned int presentModeCount = 0; vkGetPhysicalDeviceSurfacePresentModesKHR(physicalDevice, surface, &presentModeCount, nullptr); if (presentModeCount != 0) { details.presentModes.resize(presentModeCount); vkGetPhysicalDeviceSurfacePresentModesKHR(physicalDevice, surface, &presentModeCount, details.presentModes.data()); } return details; } VkResult GetAvailablePhysicalDevices(VkInstance& instance, std::vector& physicalDevices) { VkResult result = VK_SUCCESS; unsigned int deviceCount = 0; result = vkEnumeratePhysicalDevices(instance, &deviceCount, nullptr); physicalDevices.resize(deviceCount); result = vkEnumeratePhysicalDevices(instance, &deviceCount, physicalDevices.data()); return result; } bool IsPhysicalDeviceSuitable(VkPhysicalDevice& physicalDevice, VkSurfaceKHR& surface) { VkPhysicalDeviceProperties properties; VkPhysicalDeviceFeatures features; vkGetPhysicalDeviceProperties(physicalDevice, &properties); vkGetPhysicalDeviceFeatures(physicalDevice, &features); if(!CheckDeviceExtensionSupport(physicalDevice)) { return false; } // The GPU does not need to support the geometry shader feature to run this example, // however the following snippet demonstrates how to select physical devices with specific features. if(properties.deviceType == VK_PHYSICAL_DEVICE_TYPE_DISCRETE_GPU && features.geometryShader) { bool swapChainIsAdequate = false; SwapChainSupportDetails details = QuerySwapChainSupport(physicalDevice, surface); swapChainIsAdequate = !details.formats.empty() && !details.presentModes.empty(); QueueFamilyIndices indices = FindQueueFamilies(physicalDevice, surface); if (indices.isComplete() && swapChainIsAdequate) { return true; } } return false; } void ChooseBestPhysicalDevice(VkInstance& instance, VkSurfaceKHR& surface, VkPhysicalDevice& selectedPhysicalDevice) { std::vector physicalDevices; GetAvailablePhysicalDevices(instance, physicalDevices); for(auto& physicalDevice : physicalDevices) { if(IsPhysicalDeviceSuitable(physicalDevice, surface)) { selectedPhysicalDevice = physicalDevice; break; } } } void CreateBuffer(VkDevice &logicalDevice, VkPhysicalDevice& physicalDevice, VkDeviceSize size, VkBufferUsageFlags usage, VkMemoryPropertyFlags properties, VkBuffer& buffer, VkDeviceMemory& bufferMemory) { VkResult result = VK_SUCCESS; VkBufferCreateInfo bufferInfo = {}; bufferInfo.sType = VK_STRUCTURE_TYPE_BUFFER_CREATE_INFO; bufferInfo.size = size; bufferInfo.usage = usage; bufferInfo.sharingMode = VK_SHARING_MODE_EXCLUSIVE; result = vkCreateBuffer(logicalDevice, &bufferInfo, nullptr, &buffer); VkMemoryRequirements memRequirements; vkGetBufferMemoryRequirements(logicalDevice, buffer, &memRequirements); VkMemoryAllocateInfo allocInfo = {}; allocInfo.sType = VK_STRUCTURE_TYPE_MEMORY_ALLOCATE_INFO; allocInfo.allocationSize = memRequirements.size; FindMemoryType(physicalDevice, memRequirements.memoryTypeBits, properties, allocInfo.memoryTypeIndex); result = vkAllocateMemory(logicalDevice, &allocInfo, nullptr, &bufferMemory); result = vkBindBufferMemory(logicalDevice, buffer, bufferMemory, 0); } void CopyBuffer(VkDevice& logicalDevice, VkQueue& graphicsQueue, VkCommandPool& commandPool, VkBuffer& srcBuffer, VkBuffer& dstBuffer, VkDeviceSize& size) { VkCommandBufferAllocateInfo allocInfo = {}; allocInfo.sType = VK_STRUCTURE_TYPE_COMMAND_BUFFER_ALLOCATE_INFO; allocInfo.level = VK_COMMAND_BUFFER_LEVEL_PRIMARY; allocInfo.commandPool = commandPool; allocInfo.commandBufferCount = 1; VkCommandBuffer commandBuffer; vkAllocateCommandBuffers(logicalDevice, &allocInfo, &commandBuffer); VkCommandBufferBeginInfo beginInfo = {}; beginInfo.sType = VK_STRUCTURE_TYPE_COMMAND_BUFFER_BEGIN_INFO; beginInfo.flags = VK_COMMAND_BUFFER_USAGE_ONE_TIME_SUBMIT_BIT; vkBeginCommandBuffer(commandBuffer, &beginInfo); VkBufferCopy copyRegion = {}; copyRegion.srcOffset = 0; copyRegion.dstOffset = 0; copyRegion.size = size; vkCmdCopyBuffer(commandBuffer, srcBuffer, dstBuffer, 1, ©Region); vkEndCommandBuffer(commandBuffer); VkSubmitInfo submitInfo = {}; submitInfo.sType = VK_STRUCTURE_TYPE_SUBMIT_INFO; submitInfo.commandBufferCount = 1; submitInfo.pCommandBuffers = &commandBuffer; vkQueueSubmit(graphicsQueue, 1, &submitInfo, VK_NULL_HANDLE); vkDeviceWaitIdle(logicalDevice); vkFreeCommandBuffers(logicalDevice, commandPool, 1, &commandBuffer); } bool FindMemoryType(VkPhysicalDevice& physicalDevice, unsigned int typeFilter, VkMemoryPropertyFlags properties, unsigned int& memoryType) { memoryType = 0; VkPhysicalDeviceMemoryProperties memProperties; vkGetPhysicalDeviceMemoryProperties(physicalDevice, &memProperties); for (unsigned int i = 0; i < memProperties.memoryTypeCount; ++i) { if (typeFilter & (1 << i) && (memProperties.memoryTypes[i].propertyFlags & properties) == properties) { memoryType = i; return true; } } return false; } void CreateLogicalDevice(VkInstance& instance, VkPhysicalDevice& physicalDevice, VkSurfaceKHR& surface, bool enableDebugValidationLayers, VkDevice& logicalDevice, VkQueue& graphicsQueue, VkQueue& presentQueue) { VkResult result = VK_SUCCESS; QueueFamilyIndices indices = FindQueueFamilies(physicalDevice, surface); std::vector queueCreateInfos; std::set uniqueQueueFamilies = { indices.graphicsFamily, indices.presentFamily }; float queuePriority = 1.0f; for(int queueFamily : uniqueQueueFamilies) { VkDeviceQueueCreateInfo queueCreateInfo = {}; queueCreateInfo.sType = VK_STRUCTURE_TYPE_DEVICE_QUEUE_CREATE_INFO; queueCreateInfo.queueFamilyIndex = queueFamily; queueCreateInfo.queueCount = 1; queueCreateInfo.pQueuePriorities = &queuePriority; queueCreateInfos.push_back(queueCreateInfo); } VkPhysicalDeviceFeatures requiredPhysicalDeviceFeatures = {}; requiredPhysicalDeviceFeatures.geometryShader = VK_TRUE; VkDeviceCreateInfo deviceCreateInfo = {}; deviceCreateInfo.sType = VK_STRUCTURE_TYPE_DEVICE_CREATE_INFO; deviceCreateInfo.queueCreateInfoCount = static_cast(queueCreateInfos.size()); deviceCreateInfo.pQueueCreateInfos = queueCreateInfos.data(); deviceCreateInfo.pEnabledFeatures = &requiredPhysicalDeviceFeatures; deviceCreateInfo.enabledExtensionCount = static_cast(logicalDeviceExtensions.size()); deviceCreateInfo.ppEnabledExtensionNames = logicalDeviceExtensions.data(); if(enableDebugValidationLayers) { deviceCreateInfo.enabledLayerCount = static_cast(validationLayers.size()); deviceCreateInfo.ppEnabledLayerNames = validationLayers.data(); } else { deviceCreateInfo.enabledLayerCount = 0; } result = vkCreateDevice(physicalDevice, &deviceCreateInfo, nullptr, &logicalDevice); vkGetDeviceQueue(logicalDevice, indices.graphicsFamily, 0, &graphicsQueue); vkGetDeviceQueue(logicalDevice, indices.presentFamily, 0, &presentQueue); } VkResult CreateVulkanInstance(const char* applicationName, bool enableDebugValidationLayers, VkInstance *instance, VkDebugReportCallbackEXT* callback) { VkResult result = VK_SUCCESS; VkApplicationInfo appInfo; appInfo.sType = VK_STRUCTURE_TYPE_APPLICATION_INFO; appInfo.pApplicationName = applicationName; appInfo.applicationVersion = VK_MAKE_VERSION(1, 0, 0); appInfo.pEngineName = "No Engine"; appInfo.engineVersion = VK_MAKE_VERSION(1, 0, 0); appInfo.apiVersion = VK_API_VERSION_1_0; VkInstanceCreateInfo createInfo = {}; createInfo.sType = VK_STRUCTURE_TYPE_INSTANCE_CREATE_INFO; createInfo.pApplicationInfo = &appInfo; createInfo.enabledExtensionCount = static_cast(extensions.size()); createInfo.ppEnabledExtensionNames = extensions.data(); if (enableDebugValidationLayers && callback != nullptr) { createInfo.enabledLayerCount = static_cast(validationLayers.size()); createInfo.ppEnabledLayerNames = validationLayers.data(); } result = vkCreateInstance(&createInfo, 0, instance); if(enableDebugValidationLayers && callback != nullptr) { VkDebugReportCallbackCreateInfoEXT debugCreateInfo = {}; debugCreateInfo.sType = VK_STRUCTURE_TYPE_DEBUG_REPORT_CALLBACK_CREATE_INFO_EXT; debugCreateInfo.flags = VK_DEBUG_REPORT_ERROR_BIT_EXT | VK_DEBUG_REPORT_WARNING_BIT_EXT; debugCreateInfo.pfnCallback = debugCallback; result = CreateDebugReportCallbackEXT(*instance, &debugCreateInfo, nullptr, callback); } return result; } bool CreateSwapChain(VkPhysicalDevice& physicalDevice, VkDevice& logicalDevice, VkSurfaceKHR& surface, const unsigned int requestedWidth, const unsigned int requestedHeight, VkSurfaceFormatKHR& swapChainSurfaceFormat, VkExtent2D& swapChainExtents, VkSwapchainKHR& swapChain, std::vector& swapChainImages) { VkResult result = VK_SUCCESS; bool swapChainIsAdequate = false; SwapChainSupportDetails details = QuerySwapChainSupport(physicalDevice, surface); swapChainIsAdequate = !details.formats.empty() && !details.presentModes.empty(); if(!swapChainIsAdequate) { return false; } swapChainSurfaceFormat = ChooseSwapSurfaceFormat(details.formats); VkPresentModeKHR swapChainPresentMode = ChooseSwapPresentMode(details.presentModes); swapChainExtents = ChooseSwapExtent(details.capabilities, requestedWidth, requestedHeight); unsigned int imageCount = details.capabilities.minImageCount + 1; if(details.capabilities.minImageCount > 0 && imageCount > details.capabilities.maxImageCount) { imageCount = details.capabilities.maxImageCount; } VkSwapchainCreateInfoKHR createInfo = {}; createInfo.sType = VK_STRUCTURE_TYPE_SWAPCHAIN_CREATE_INFO_KHR; createInfo.surface = surface; createInfo.minImageCount = imageCount; createInfo.imageFormat = swapChainSurfaceFormat.format; createInfo.imageColorSpace = swapChainSurfaceFormat.colorSpace; createInfo.imageExtent = swapChainExtents; createInfo.imageArrayLayers = 1; createInfo.imageUsage = VK_IMAGE_USAGE_COLOR_ATTACHMENT_BIT; QueueFamilyIndices indices = FindQueueFamilies(physicalDevice, surface); unsigned int queueFamilyIndices[] = { (unsigned int)indices.graphicsFamily, (unsigned int)indices.presentFamily }; if(indices.graphicsFamily != indices.presentFamily) { createInfo.imageSharingMode = VK_SHARING_MODE_CONCURRENT; createInfo.queueFamilyIndexCount = 2; createInfo.pQueueFamilyIndices = queueFamilyIndices; } else { createInfo.imageSharingMode = VK_SHARING_MODE_EXCLUSIVE; createInfo.queueFamilyIndexCount = 0; createInfo.pQueueFamilyIndices = nullptr; } createInfo.preTransform = details.capabilities.currentTransform; createInfo.compositeAlpha = VK_COMPOSITE_ALPHA_OPAQUE_BIT_KHR; createInfo.presentMode = swapChainPresentMode; createInfo.clipped = true; createInfo.oldSwapchain = VK_NULL_HANDLE; result = vkCreateSwapchainKHR(logicalDevice, &createInfo, nullptr, &swapChain); vkGetSwapchainImagesKHR(logicalDevice, swapChain, &imageCount, nullptr); swapChainImages.resize(imageCount); vkGetSwapchainImagesKHR(logicalDevice, swapChain, &imageCount, swapChainImages.data()); return true; } void CreateSwapChainImageViews(VkDevice& logicalDevice, std::vector& swapChainImages, VkFormat& swapChainFormat, std::vector& swapChainImageViews) { swapChainImageViews.resize(swapChainImages.size()); for(unsigned int i = 0; i < swapChainImages.size(); ++i) { VkImageViewCreateInfo createInfo = {}; createInfo.sType = VK_STRUCTURE_TYPE_IMAGE_VIEW_CREATE_INFO; createInfo.image = swapChainImages[i]; createInfo.viewType = VK_IMAGE_VIEW_TYPE_2D; createInfo.format = swapChainFormat; createInfo.components.r = VK_COMPONENT_SWIZZLE_IDENTITY; createInfo.components.g = VK_COMPONENT_SWIZZLE_IDENTITY; createInfo.components.b = VK_COMPONENT_SWIZZLE_IDENTITY; createInfo.components.a = VK_COMPONENT_SWIZZLE_IDENTITY; createInfo.subresourceRange.aspectMask = VK_IMAGE_ASPECT_COLOR_BIT; createInfo.subresourceRange.baseMipLevel = 0; createInfo.subresourceRange.levelCount = 1; createInfo.subresourceRange.baseArrayLayer = 0; createInfo.subresourceRange.layerCount = 1; vkCreateImageView(logicalDevice, &createInfo, nullptr, &swapChainImageViews[i]); } } VkExtent2D ChooseSwapExtent(const VkSurfaceCapabilitiesKHR& capabilities, const unsigned int width, const unsigned int height) { if(capabilities.currentExtent.width != std::numeric_limits::max()) { return capabilities.currentExtent; } else { VkExtent2D actualExtent = { width, height }; actualExtent.width = std::max(capabilities.minImageExtent.width, std::max(capabilities.maxImageExtent.width, actualExtent.width)); actualExtent.height = std::max(capabilities.minImageExtent.height, std::max(capabilities.maxImageExtent.height, actualExtent.height)); return actualExtent; } } VkPresentModeKHR ChooseSwapPresentMode(const std::vector availablePresentModes) { VkPresentModeKHR bestMode = VK_PRESENT_MODE_FIFO_KHR; for( const auto& availablePresentMode : availablePresentModes) { if(availablePresentMode == VK_PRESENT_MODE_MAILBOX_KHR) { return availablePresentMode; } else if(availablePresentMode == VK_PRESENT_MODE_IMMEDIATE_KHR) { bestMode = availablePresentMode; } } return bestMode; } VkSurfaceFormatKHR ChooseSwapSurfaceFormat(const std::vector availableFormats) { if(availableFormats.size() == 1 && availableFormats[0].format == VK_FORMAT_UNDEFINED) { return { VK_FORMAT_B8G8R8A8_UNORM, VK_COLOR_SPACE_SRGB_NONLINEAR_KHR }; } for(const auto& availableFormat : availableFormats) { if(availableFormat.format == VK_FORMAT_B8G8R8A8_UNORM && availableFormat.colorSpace == VK_COLOR_SPACE_SRGB_NONLINEAR_KHR) { return availableFormat; } } return availableFormats[0]; } void CreateDescriptorSetLayout(VkDevice& logicalDevice, VkDescriptorSetLayout& descriptorSetLayout) { VkResult result = VK_SUCCESS; VkDescriptorSetLayoutBinding uboBindingInfo = {}; uboBindingInfo.binding = 0; uboBindingInfo.descriptorCount = 1; uboBindingInfo.descriptorType = VK_DESCRIPTOR_TYPE_UNIFORM_BUFFER; uboBindingInfo.stageFlags = VK_SHADER_STAGE_VERTEX_BIT; VkDescriptorSetLayoutCreateInfo layoutInfo = {}; layoutInfo.sType = VK_STRUCTURE_TYPE_DESCRIPTOR_SET_LAYOUT_CREATE_INFO; layoutInfo.bindingCount = 1; layoutInfo.pBindings = &uboBindingInfo; result = vkCreateDescriptorSetLayout(logicalDevice, &layoutInfo, nullptr, &descriptorSetLayout); } void DestroyDebugReportCallbackEXT(VkInstance& instance, VkDebugReportCallbackEXT& callback) { DestroyDebugReportCallbackEXT(instance, &callback, nullptr); } |
VulkanVertexBuffer.h
|
1 2 3 4 5 6 7 8 9 10 11 12 13 14 15 16 17 18 19 20 21 22 23 24 25 26 27 28 29 30 31 32 33 34 35 36 37 38 39 40 41 42 43 44 45 46 47 48 49 50 51 52 53 54 55 56 57 58 59 60 61 62 63 64 65 66 67 68 69 70 71 72 73 74 75 76 77 78 79 80 81 82 83 84 85 86 87 88 89 90 91 92 93 94 95 96 |
#ifndef __VULKAN_VERTEX_BUFFER__ #define __VULKAN_VERTEX_BUFFER__ #define GLFW_INCLUDE_VULKAN #include <glfw/include/GLFW/glfw3.h> #include #include #include <glm/glm.hpp> struct Vertex { glm::vec3 pos; glm::vec3 color; glm::vec2 uv; static VkVertexInputBindingDescription GetBindingDescription() { VkVertexInputBindingDescription bindingDescription = {}; bindingDescription.binding = 0; bindingDescription.stride = sizeof(Vertex); bindingDescription.inputRate = VK_VERTEX_INPUT_RATE_VERTEX; return bindingDescription; } static std::array<VkVertexInputAttributeDescription, 3> GetAttributeDesciptions() { std::array<VkVertexInputAttributeDescription, 3> attributeDescriptions = {}; attributeDescriptions[0].binding = 0; attributeDescriptions[0].location = 0; attributeDescriptions[0].format = VK_FORMAT_R32G32B32_SFLOAT; attributeDescriptions[0].offset = offsetof(Vertex, pos); attributeDescriptions[1].binding = 0; attributeDescriptions[1].location = 1; attributeDescriptions[1].format = VK_FORMAT_R32G32B32_SFLOAT; attributeDescriptions[1].offset = offsetof(Vertex, color); attributeDescriptions[2].binding = 0; attributeDescriptions[2].location = 2; attributeDescriptions[2].format = VK_FORMAT_R32G32_SFLOAT; attributeDescriptions[2].offset = offsetof(Vertex, uv); return attributeDescriptions; } }; class VulkanVertexBuffer { public: VulkanVertexBuffer() {} void Initialize(VkDevice& logicalDevice, VkPhysicalDevice& physicalDevice, VkQueue& graphicsQueue, VkCommandPool& commandPool); void SetMeshData(std::vector vertices, std::vector indices); void Build(); void Shutdown(); inline VkBuffer& GetVulkanVertexBuffer() { return m_vkVertexBuffer; } inline unsigned int GetVertexCount() { return static_cast(m_Vertices.size()); } inline VkBuffer& GetVulkanIndexBuffer() { return m_vkIndexBuffer; } inline unsigned int GetIndexCount() { return static_cast(m_Indices.size()); } private: void BuildVertexBuffer(); void BuildIndexBuffer(); VkDevice m_vkDevice; VkPhysicalDevice m_vkPhysicalDevice; std::vector m_Vertices; std::vector m_Indices; VkQueue m_vkGraphicsQueue; VkCommandPool m_vkCommandPool; VkBuffer m_vkVertexBuffer; VkDeviceMemory m_vkVertexBufferMemory; VkBuffer m_vkIndexBuffer; VkDeviceMemory m_vkIndexBufferMemory; }; #endif |
VulkanVertexBuffer.cpp
|
1 2 3 4 5 6 7 8 9 10 11 12 13 14 15 16 17 18 19 20 21 22 23 24 25 26 27 28 29 30 31 32 33 34 35 36 37 38 39 40 41 42 43 44 45 46 47 48 49 50 51 52 53 54 55 56 57 58 59 60 61 62 63 64 65 66 67 68 69 70 71 72 73 74 75 |
#include "VulkanVertexBuffer.h" #include "VulkanHelper.h" void VulkanVertexBuffer::Initialize(VkDevice& logicalDevice, VkPhysicalDevice& physicalDevice, VkQueue& graphicsQueue, VkCommandPool& commandPool) { m_vkDevice = logicalDevice; m_vkPhysicalDevice = physicalDevice; m_vkGraphicsQueue = graphicsQueue; m_vkCommandPool = commandPool; } void VulkanVertexBuffer::Shutdown() { vkDestroyBuffer(m_vkDevice, m_vkIndexBuffer, nullptr); vkFreeMemory(m_vkDevice, m_vkIndexBufferMemory, nullptr); vkDestroyBuffer(m_vkDevice, m_vkVertexBuffer, nullptr); vkFreeMemory(m_vkDevice, m_vkVertexBufferMemory, nullptr); } void VulkanVertexBuffer::SetMeshData(std::vector vertices, std::vector indices) { m_Vertices = vertices; m_Indices = indices; } void VulkanVertexBuffer::Build() { BuildVertexBuffer(); BuildIndexBuffer(); } void VulkanVertexBuffer::BuildVertexBuffer() { VkResult result = VK_SUCCESS; VkBuffer stagingBuffer; VkDeviceMemory stagingBufferMemory; uint64_t size = sizeof(m_Vertices[0]) * m_Vertices.size(); CreateBuffer(m_vkDevice, m_vkPhysicalDevice, size, VK_BUFFER_USAGE_TRANSFER_SRC_BIT, VK_MEMORY_PROPERTY_HOST_VISIBLE_BIT | VK_MEMORY_PROPERTY_HOST_COHERENT_BIT, stagingBuffer, stagingBufferMemory); void* data; vkMapMemory(m_vkDevice, stagingBufferMemory, 0, size, 0, &data); memcpy(data, m_Vertices.data(), static_cast(size)); vkUnmapMemory(m_vkDevice, stagingBufferMemory); CreateBuffer(m_vkDevice, m_vkPhysicalDevice, size, VK_BUFFER_USAGE_TRANSFER_DST_BIT | VK_BUFFER_USAGE_VERTEX_BUFFER_BIT, VK_MEMORY_PROPERTY_DEVICE_LOCAL_BIT, m_vkVertexBuffer, m_vkVertexBufferMemory); CopyBuffer(m_vkDevice, m_vkGraphicsQueue, m_vkCommandPool, stagingBuffer, m_vkVertexBuffer, size); vkDestroyBuffer(m_vkDevice, stagingBuffer, nullptr); vkFreeMemory(m_vkDevice, stagingBufferMemory, nullptr); } void VulkanVertexBuffer::BuildIndexBuffer() { VkResult result = VK_SUCCESS; VkBuffer stagingBuffer; VkDeviceMemory stagingBufferMemory; uint64_t size = sizeof(m_Indices[0]) * m_Indices.size(); CreateBuffer(m_vkDevice, m_vkPhysicalDevice, size, VK_BUFFER_USAGE_TRANSFER_SRC_BIT, VK_MEMORY_PROPERTY_HOST_VISIBLE_BIT | VK_MEMORY_PROPERTY_HOST_COHERENT_BIT, stagingBuffer, stagingBufferMemory); void* data; vkMapMemory(m_vkDevice, stagingBufferMemory, 0, size, 0, &data); memcpy(data, m_Indices.data(), static_cast(size)); vkUnmapMemory(m_vkDevice, stagingBufferMemory); CreateBuffer(m_vkDevice, m_vkPhysicalDevice, size, VK_BUFFER_USAGE_TRANSFER_DST_BIT | VK_BUFFER_USAGE_INDEX_BUFFER_BIT, VK_MEMORY_PROPERTY_DEVICE_LOCAL_BIT, m_vkIndexBuffer, m_vkIndexBufferMemory); CopyBuffer(m_vkDevice, m_vkGraphicsQueue, m_vkCommandPool, stagingBuffer, m_vkIndexBuffer, size); vkDestroyBuffer(m_vkDevice, stagingBuffer, nullptr); vkFreeMemory(m_vkDevice, stagingBufferMemory, nullptr); } |
vertex.vert (Vertex Shader)
|
1 2 3 4 5 6 7 8 9 10 11 12 13 14 15 16 17 18 19 20 21 22 23 24 25 26 27 28 29 30 31 32 |
#version 450 #extension GL_ARB_separate_shader_objects : enable layout(binding = 0) uniform UniformBufferObject { mat4 model[30]; mat4 view; mat4 proj; vec2 resolution; float time; } ubo; layout(location = 0) in vec3 inPosition; layout(location = 1) in vec3 inColor; layout(location = 2) in vec2 inUV; layout(location = 0) out vec3 fragColor; layout(location = 1) out vec2 uv; layout(location = 2) out float time; out gl_PerVertex { vec4 gl_Position; }; void main() { gl_Position = ubo.proj * ubo.view * ubo.model[gl_InstanceIndex] * vec4(inPosition, 1.0); fragColor = inColor; uv = inUV; time = ubo.time; } |
fragment.frag (Fragment Shader)
|
1 2 3 4 5 6 7 8 9 10 11 12 |
#version 450 #extension GL_ARB_separate_shader_objects : enable layout(location = 0) in vec3 fragColor; layout(location = 1) in vec2 uv; layout(location = 2) in float time; layout(location = 0) out vec4 outColor; void main() { outColor = vec4(fragColor, 1.0); } |
Download the Sample Project
Useful Links:
References:
- vulkan-tutorial.com
- Vulkan Cookbook By Pawel Lapinsk
- Introduction to the Vulkan Graphics API By Professor Mike Bailey of Oregon State University